Organizations
Learn what organizations are, how to structure them, and how to manage settings and members.
In Blazelock, an organization is the central level where you work. It is the foundation for using Blazelock and groups everything that belongs together in one operational context.
If you create a new organization, you set up a new independent area for that company, team, or business area. If you are invited by another user, you join the existing organization you were invited to.
Each organization has its own members, integrations, resources, settings, and billing setup. Integrations and other resources are always managed within an organization. Your personal account can belong to multiple organizations, but each organization manages its membership and billing independently.
Create a new organization
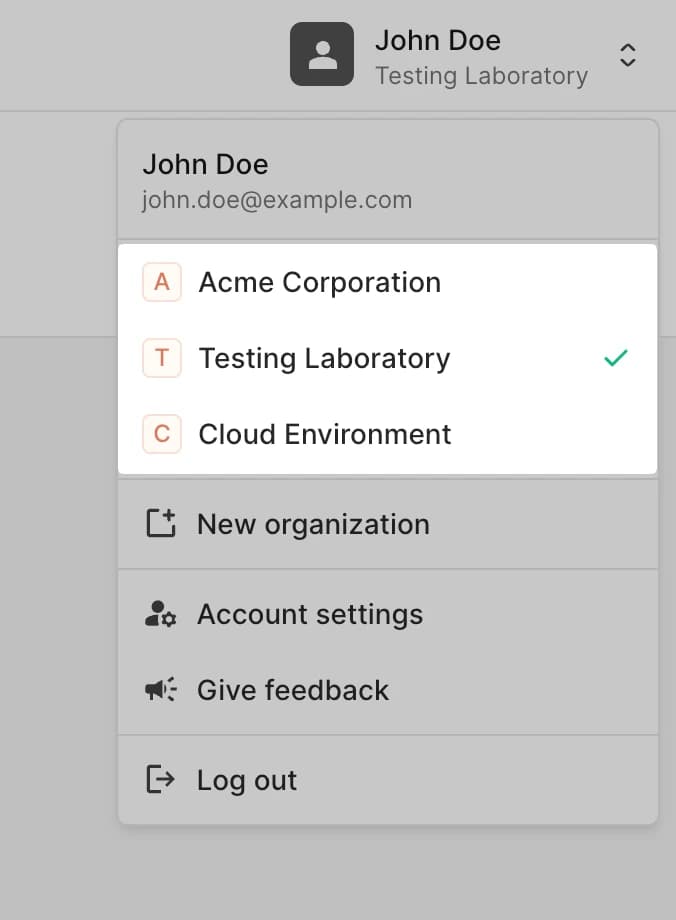
You can create a new organization directly from the user menu. The same menu is also used later to switch between organizations.
Click your name in the dashboard header to open the user menu.
Select New organization, enter the organization name, and confirm the creation.
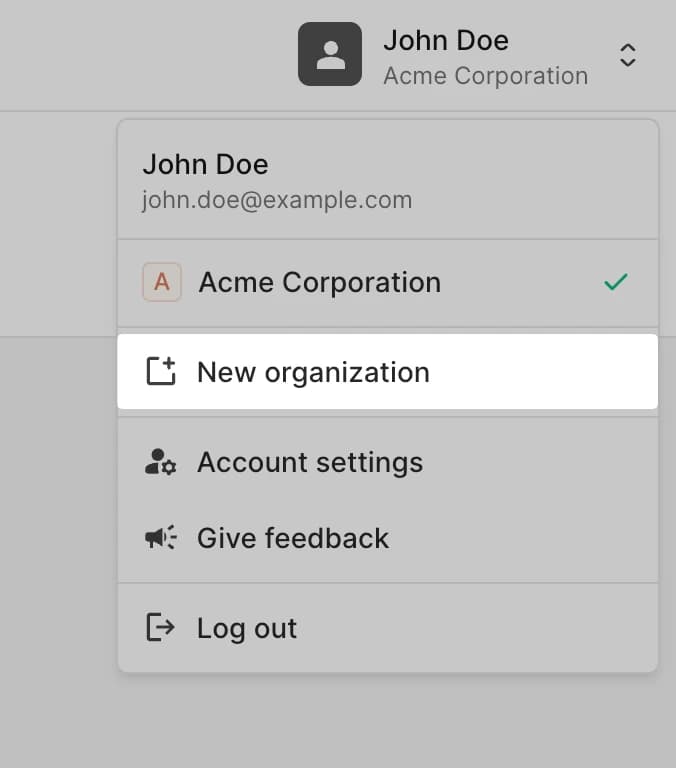
Blazelock creates the organization and opens its dashboard immediately.
When you create an organization, Blazelock also creates a slug automatically from the name. You can refine that slug later in the organization settings.
The organization name is primarily a display name inside the dashboard. Choose a name that helps users recognize the correct workspace quickly. It is not intended as the primary billing identifier.
Settings
The Settings area is the page reached from the main navigation at the top of the dashboard. It contains the main administrative options for the organization and is where admins maintain key organization details and manage access for other users.

Overview
The Overview section is where admins manage the basic information of the organization. This includes the visible organization name that appears throughout the dashboard and in the organization switcher.
Organization slug
The organization slug is the short identifier that appears in the URL. For example, if the slug is acme-security, a settings URL looks like app.blazelock.com/@acme-security/settings.
If the slug is changed later, users should update saved bookmarks or internal links. Old URLs with the previous slug are no longer accessible.
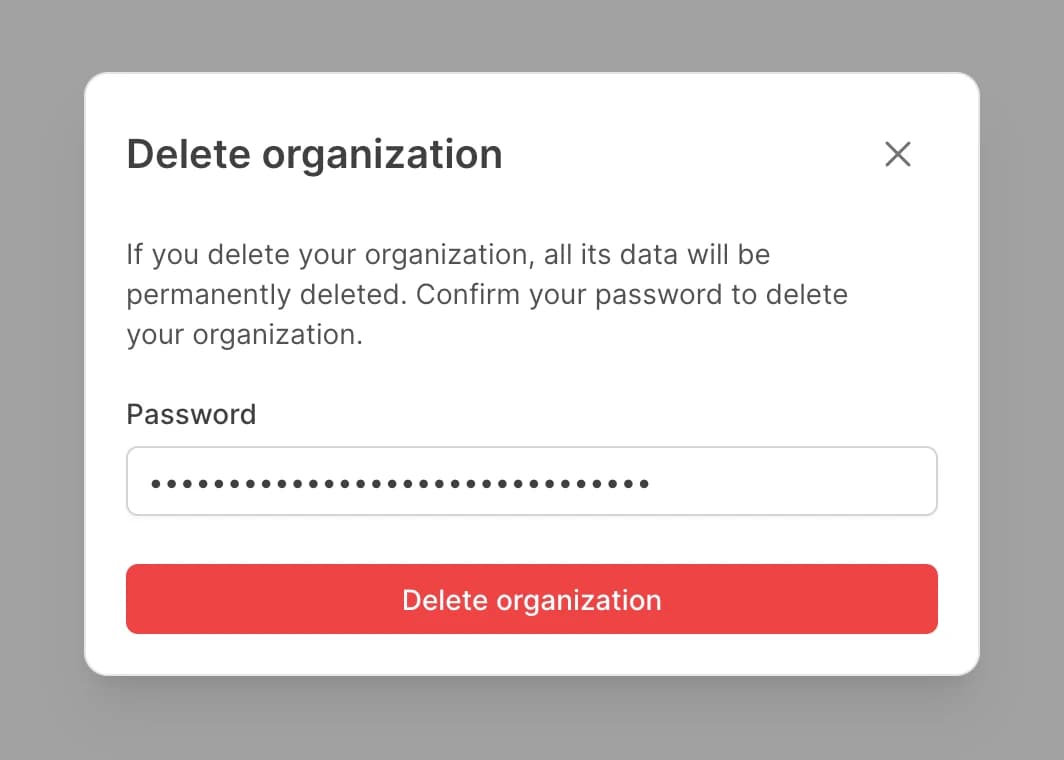
Delete an organization
Admins can delete an organization from the General settings page. This action permanently removes the organization and its associated data, so it should be used with care.
To confirm the deletion, Blazelock asks for the current password in a confirmation dialog. This extra confirmation helps prevent accidental deletion.
Deleting an organization is permanently destructive and cannot be undone. All organization member, integration, and resource data will be terminated immediately.
Roles
Organizations use roles to define who can manage the organization and who can work within it. Roles help keep administrative access limited while still allowing teams to collaborate in the same workspace.
| Permission | Admin | Member |
|---|---|---|
| Access organization resources and integrations | ✅ | ✅ |
| Change organization settings | ✅ | ❌ |
| Invite members and revoke invitations | ✅ | ❌ |
| Change member roles | ✅ | ❌ |
| Remove members | ✅ | ❌ |
| Manage organization billing | ✅ | ❌ |
Blazelock requires at least one admin in every organization. If a role change or removal would leave the organization without an admin, Blazelock stops the action and shows an error message.
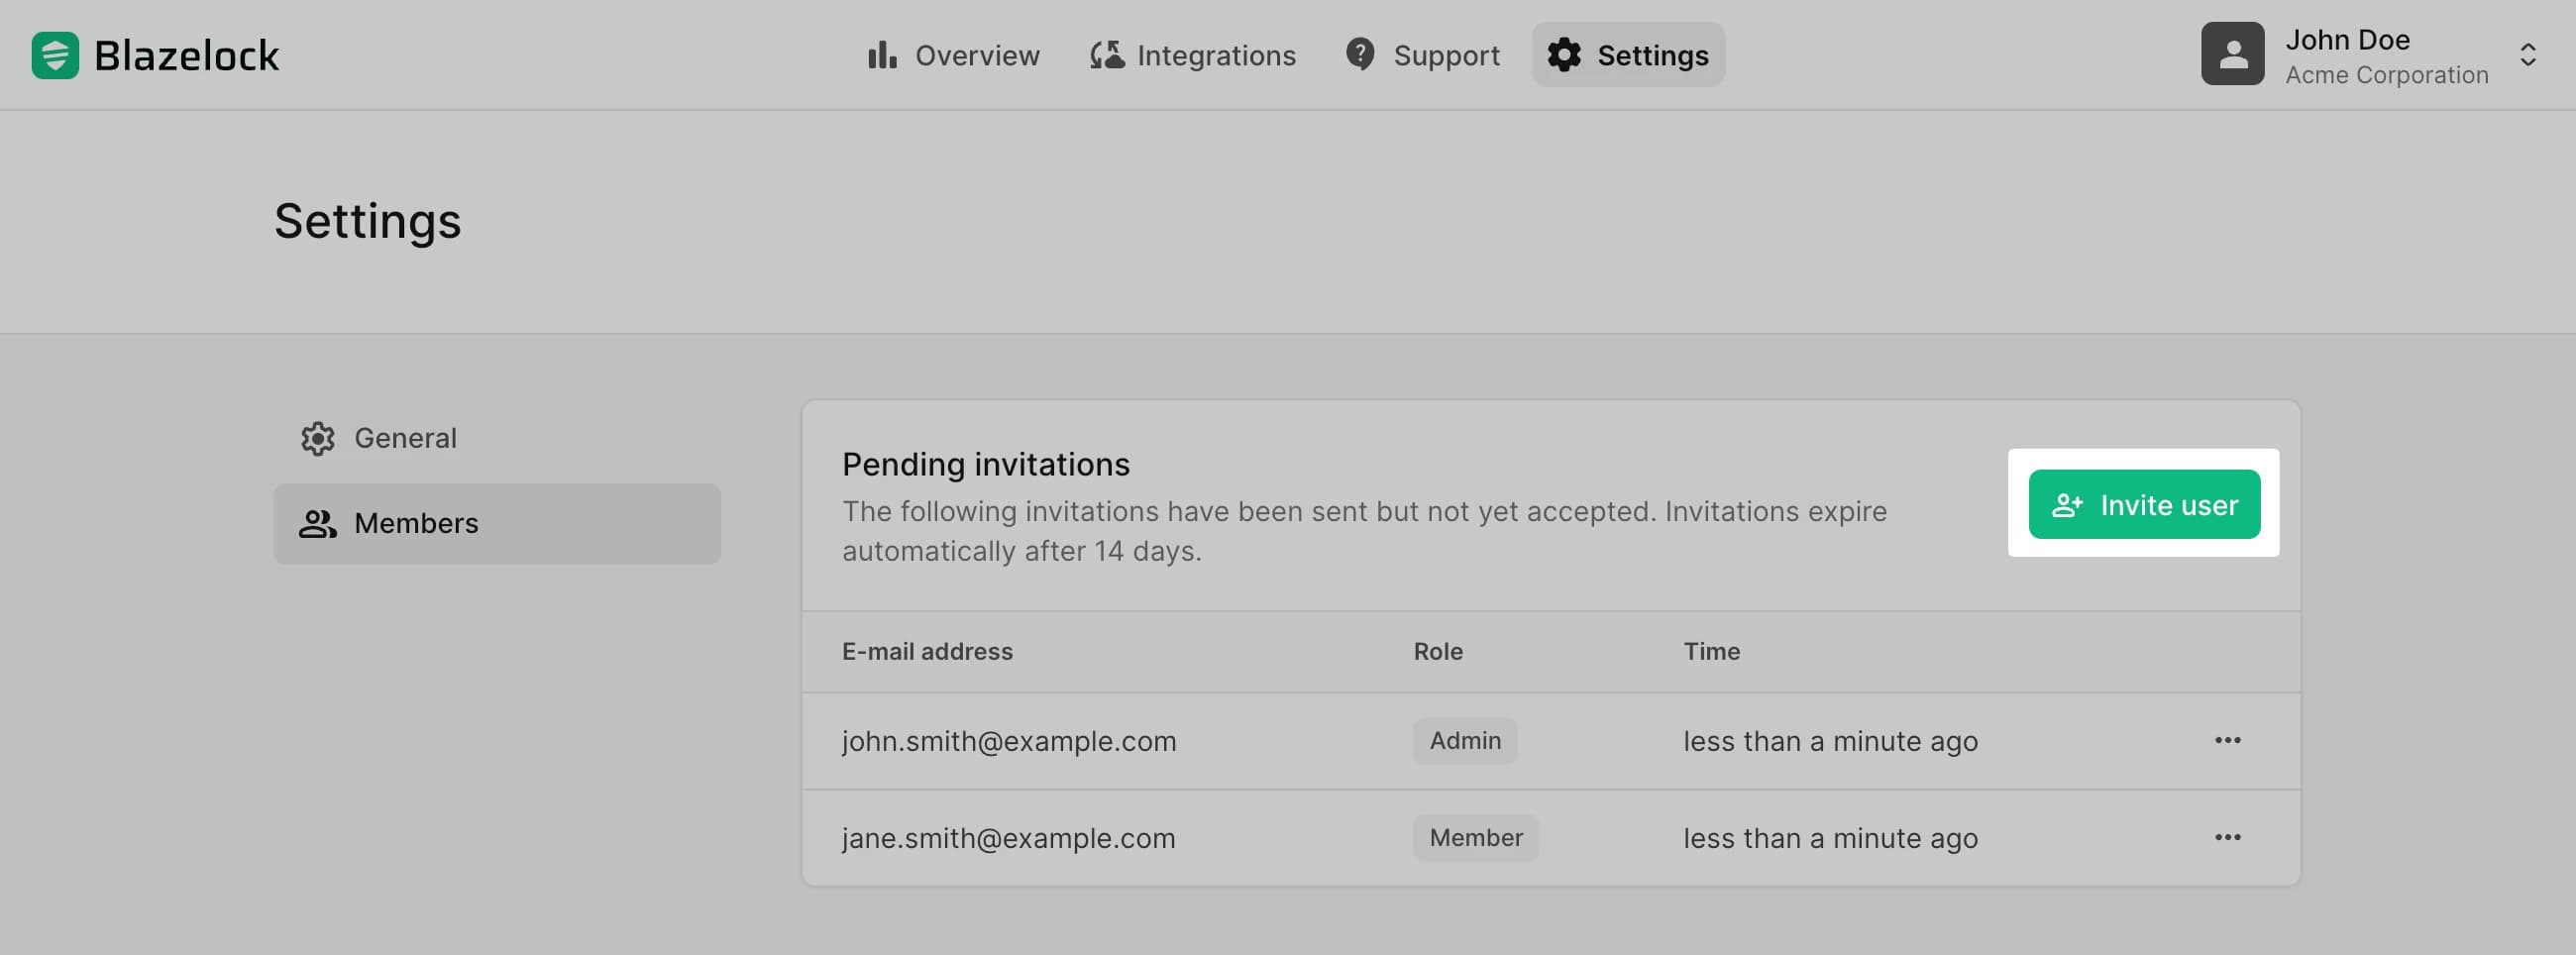
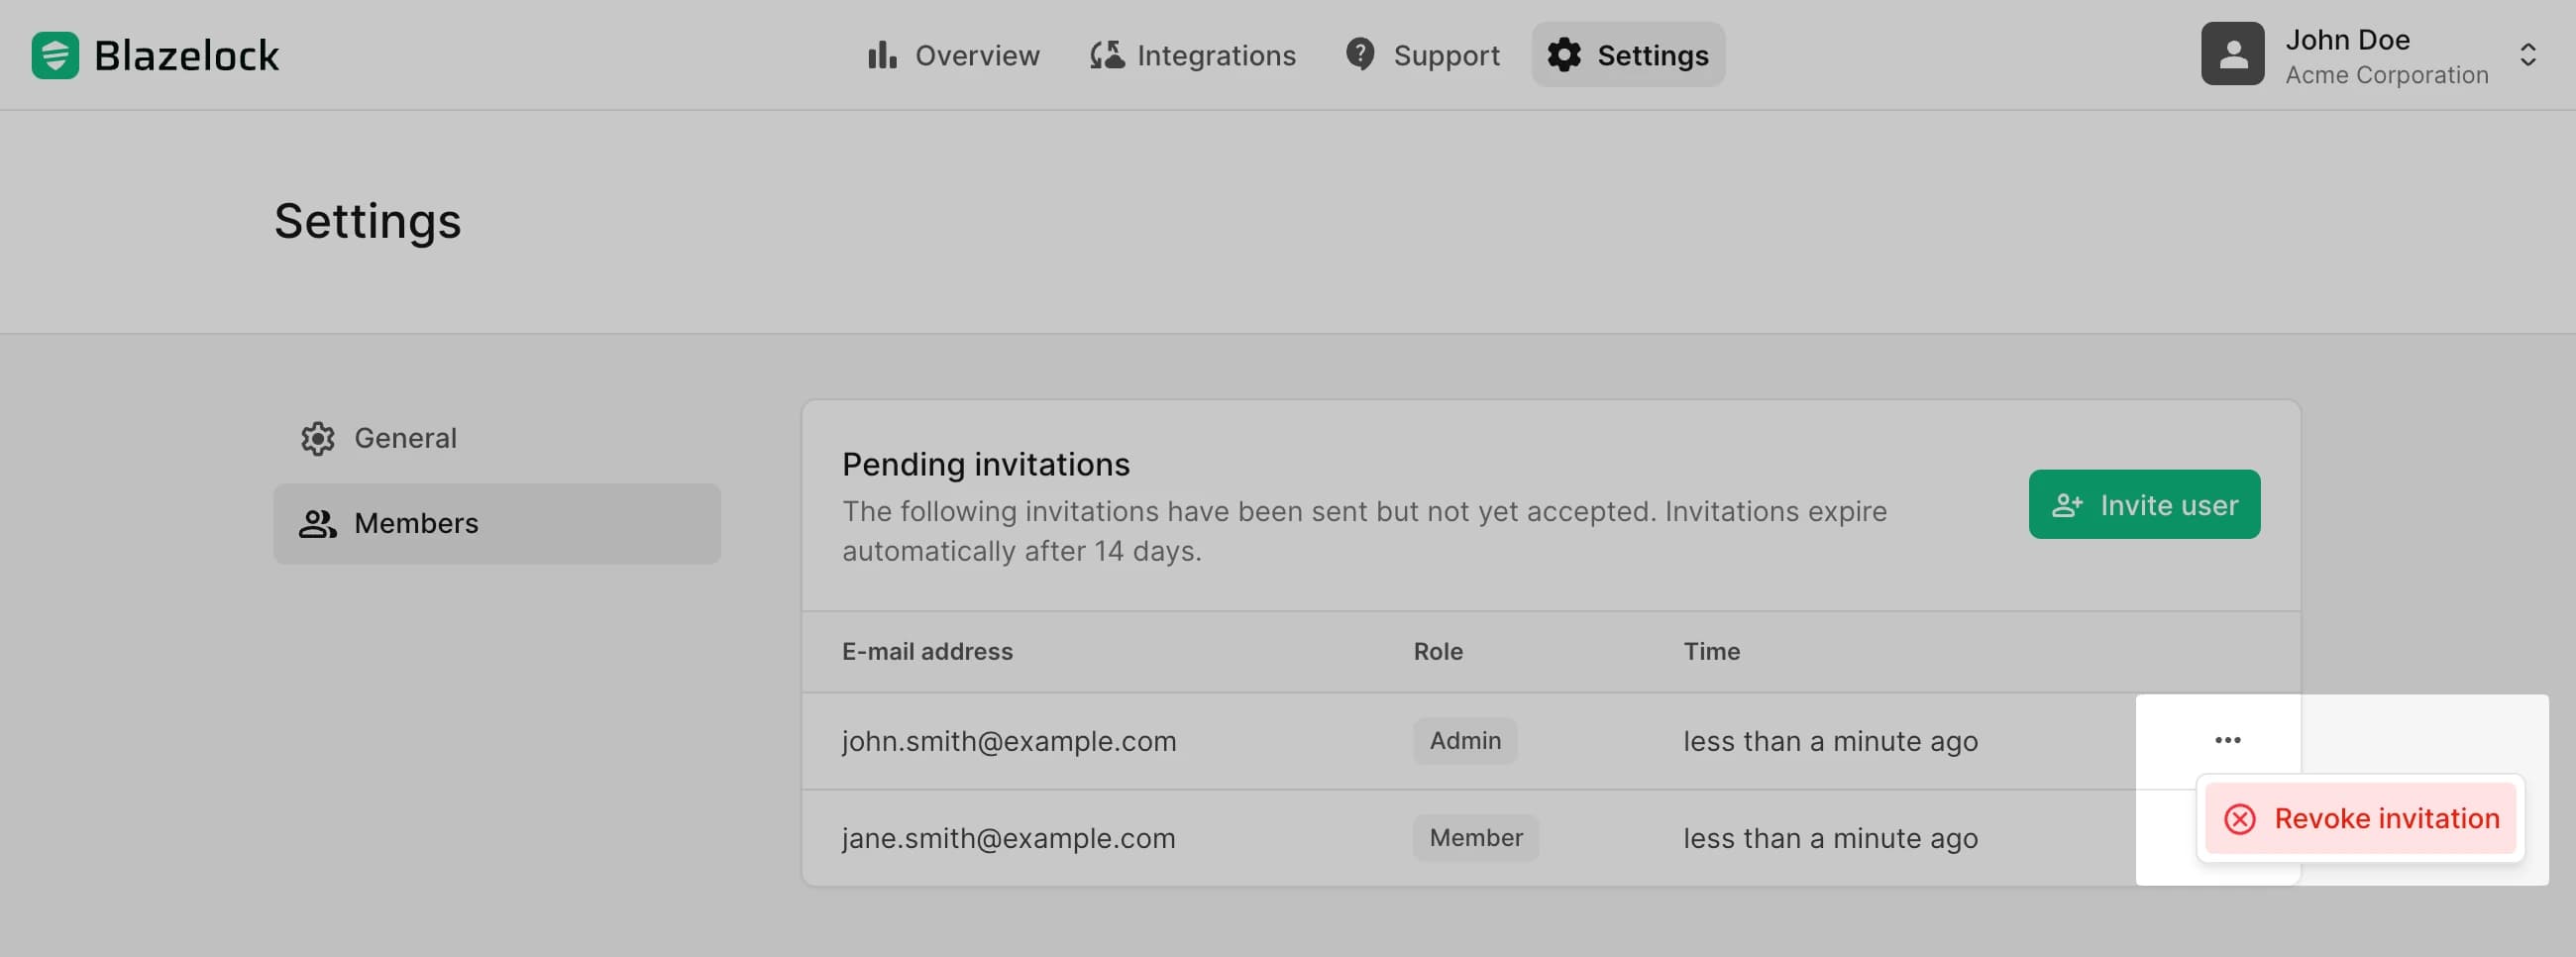
Members
The Members area gives admins a clear overview of who currently has access to the organization. It helps answer practical questions such as who is already part of the workspace, which role each person has, and whether access still matches current responsibilities.
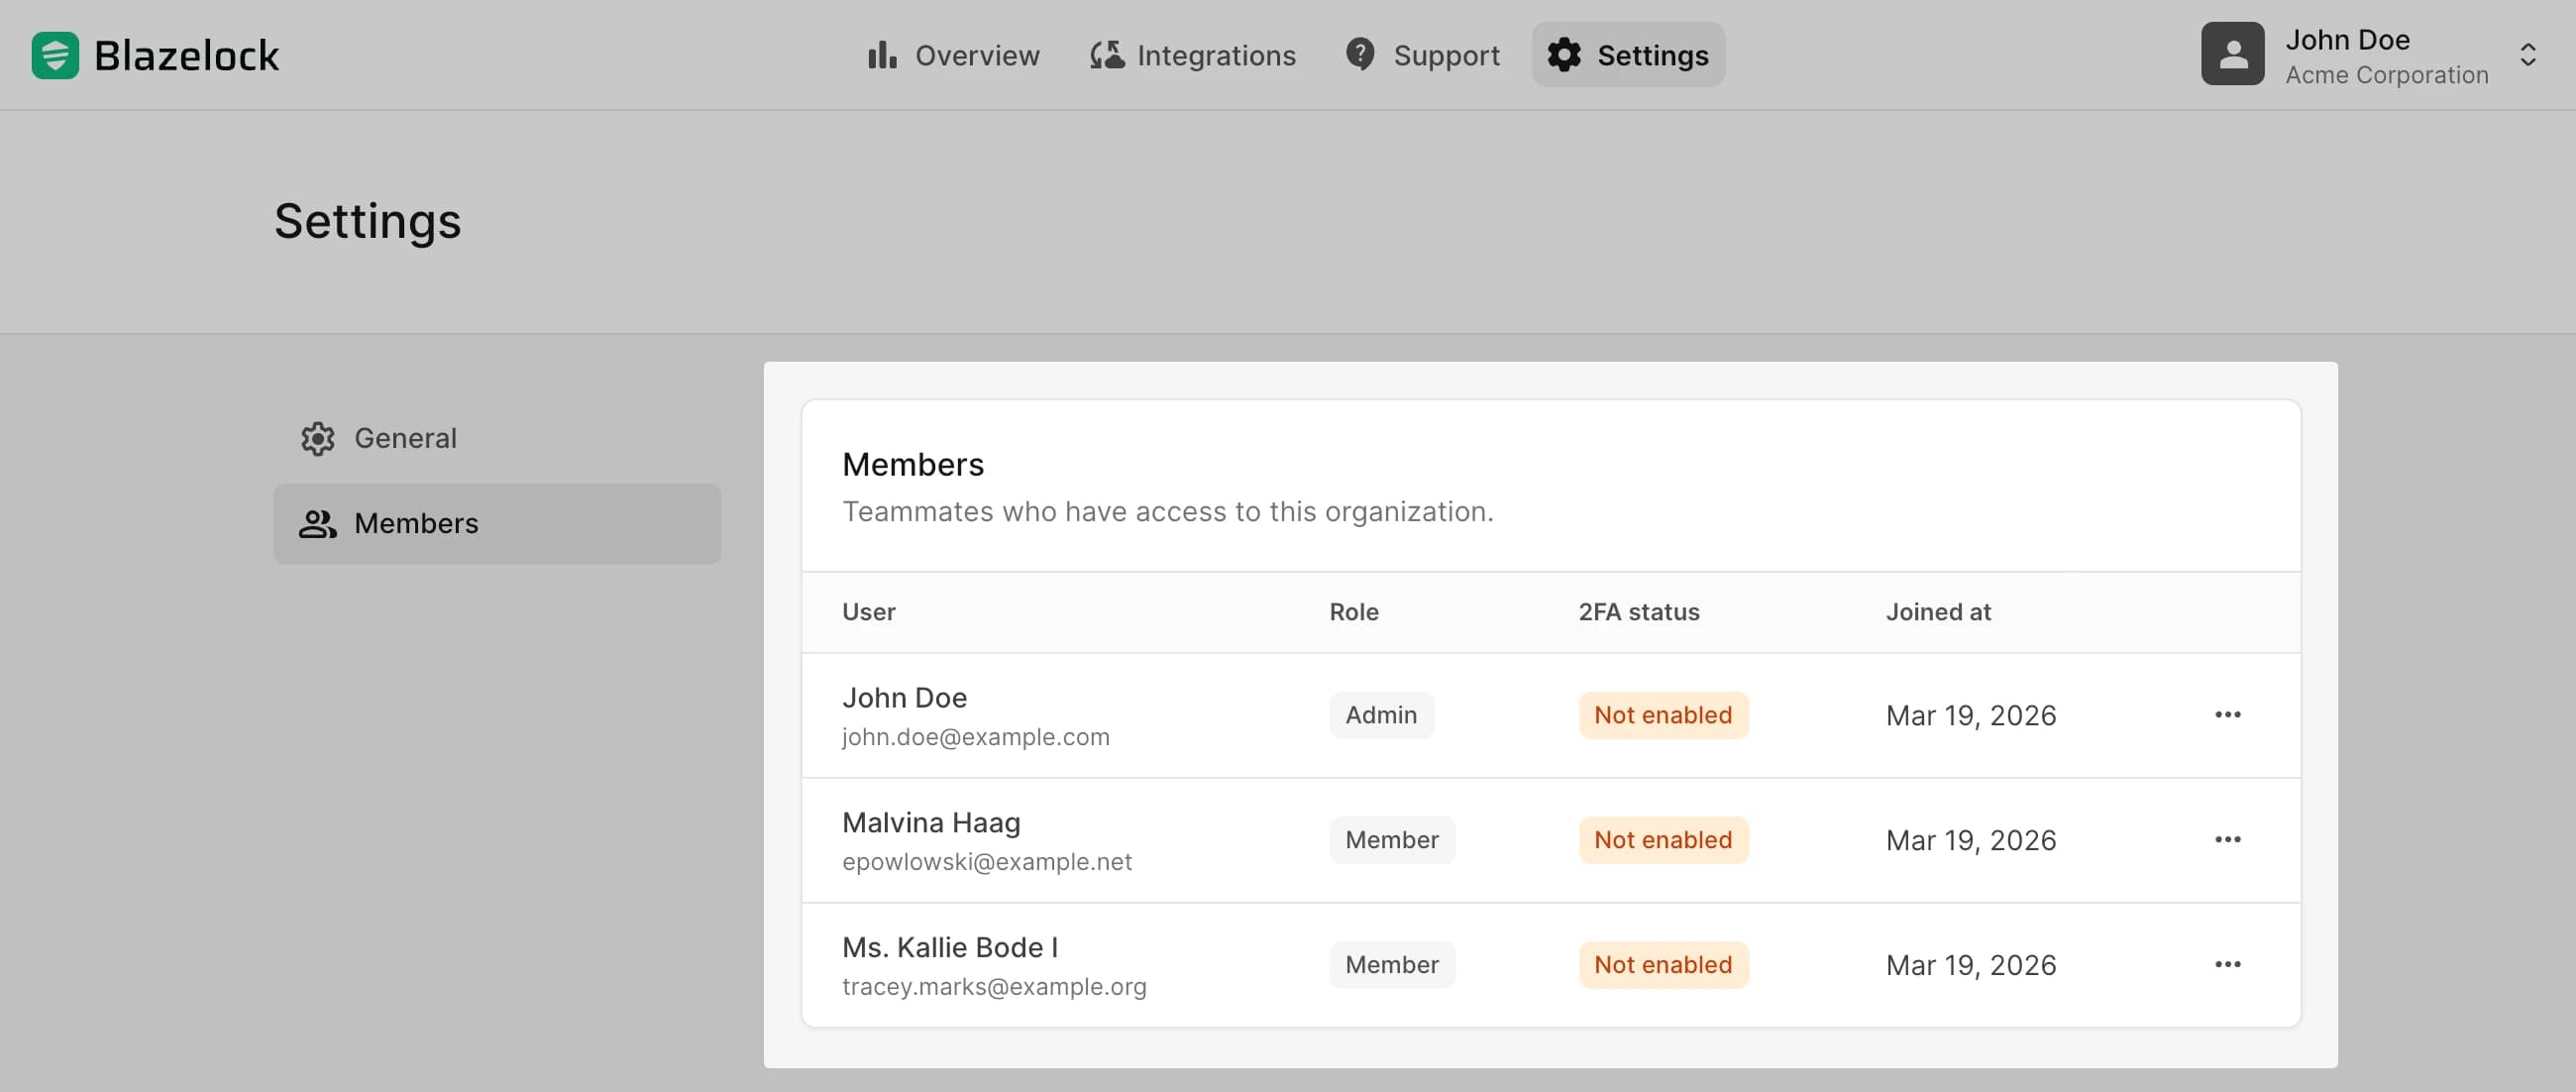
Edit a member
To edit a user, open the actions menu for that entry in the member list and select the edit action. In the dialog that opens, update the assigned role and save the change. This is useful when someone takes on additional administrative responsibility or should return to a standard member role.
Remove a member
To remove a user, open the actions menu for that entry in the member list and choose the remove action. Once removed, that user immediately loses access to the organization. If access is needed again later, an admin must send a new invitation.
Invitations
Admins can invite new members directly from the Members settings page. To send an invitation, enter the user's email address and choose the role that should be assigned after acceptance.
Blazelock then sends an invitation email to that person. Once the invitation is accepted, the user becomes a member of the organization with the selected role.
Invite a user
Open the Members page and click the action to invite a new user.
Enter the email address, choose the role, and send the invitation.
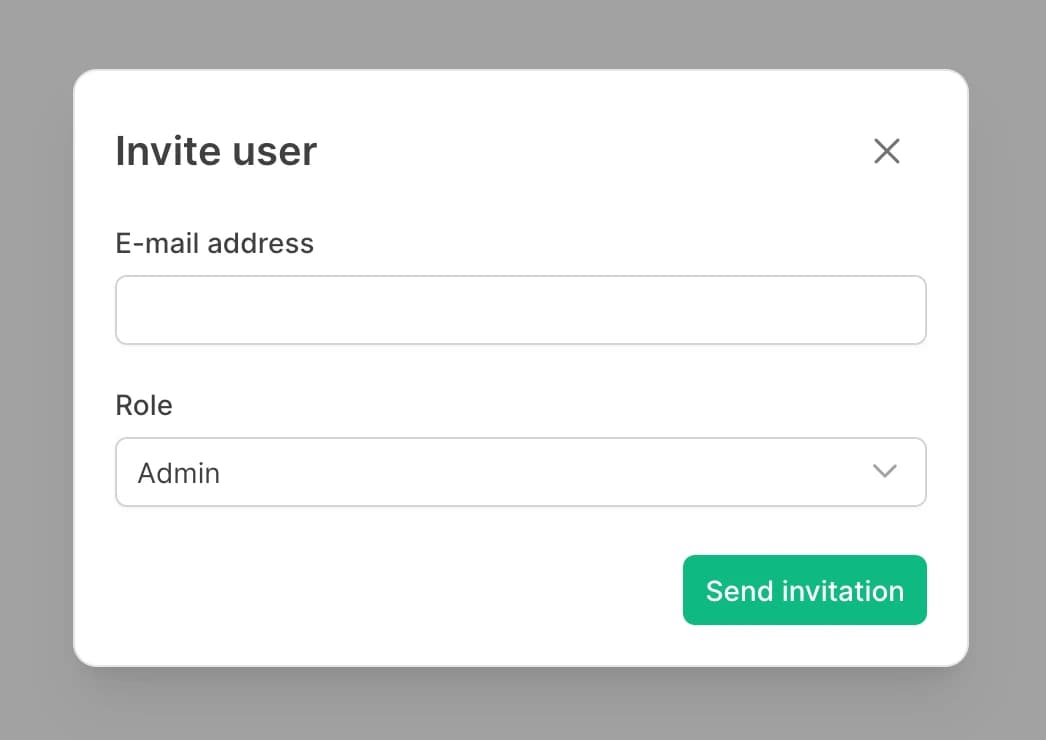
The invited person then receives an email with a link to accept the invitation.
Invite the correct email address
An invitation is valid only for the exact email address that was invited. The user must sign up for Blazelock with that same email address, or sign in with that same address if an account already exists.
Open invitations remain visible in a separate list on the same page. This helps admins see which invitations are still pending and revoke them if they are no longer needed.
Revoke an invitation
To revoke an invitation, open the pending invitations list on the Members page and use the revoke action for the relevant entry. This is useful if an invitation was sent to the wrong person or should no longer remain valid.
Invitations expire automatically after 14 days if they are not accepted. If you still want to invite the same person after that point, send a new invitation.
Multiple organizations and switching
Blazelock is designed for users who may need access to more than one organization. A single personal account can belong to multiple organizations, and users can switch between them from the user menu in the dashboard header.
This is useful when:
- One person works across several companies or business areas
- A larger company wants separate organizations for different teams or departments
- Resources, integrations, or billing should stay clearly separated
Each organization remains independent in its membership, settings, integrations, and billing. That gives you flexibility without requiring separate user accounts for every workspace.
Our recommendation is to start with one organization for your company. Additional organizations often make sense when separate teams, departments, business areas, resources, or billing flows need a clearer boundary. At the same time, you are free to structure organizations in the way that fits your business best.